
How to Add AI Search to a Shopify Store
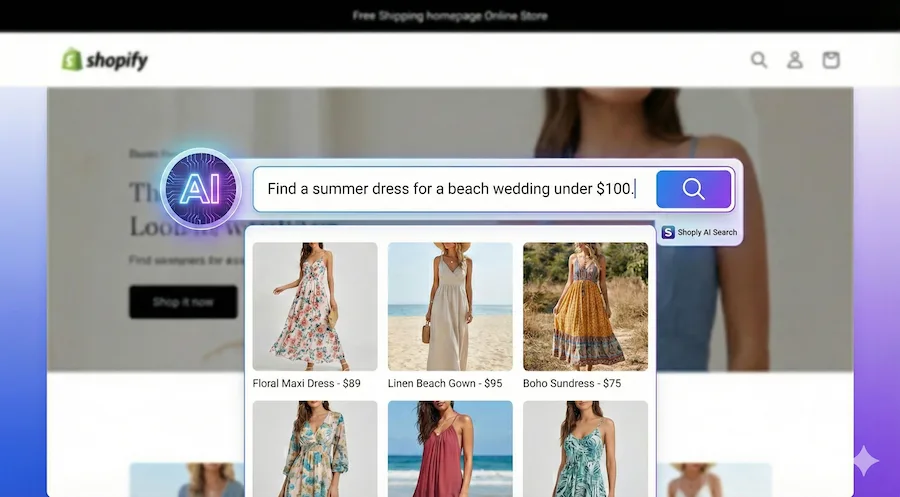
Your store’s default search is holding you back. Shopify’s built-in search relies on basic keyword matching — it can’t handle misspellings, complex queries like “red dress under $50,” or understand what customers actually mean.
Shoply AI Search replaces your default search with an AI-powered experience that understands natural language, supports multi-constraint queries, and helps customers find the right products faster. Here’s how to set it up in a few steps.
Step 1: Install Shoply AI Search and Chatbot
Head to the Shopify App Store and install Shoply AI . Once installed, the app will automatically crawl your product catalog to build an AI-powered search index. This process takes anywhere from a few minutes to a few hours depending on the size of your store.
You’ll receive a welcome email when your store is ready.
Step 2: Enable AI Search in the Theme Editor
Once the app is installed and your store is indexed, enable AI Search through Shopify’s Theme Editor:
- Go to Online Store > Themes in your Shopify admin
- Click Edit theme on your current theme
- Find Shoply AI Chatbot in the App Embeds section (left sidebar)
- Toggle it on and click Save
Want to test before going live?
If you’d like to try AI Search without affecting your live store search experience:
- In the Shoply AI admin panel, go to Settings and set “Use Shoply AI Search to Replace Default Search Results” to Disabled
- Enable the app embed in the Theme Editor as described above
- Visit your store’s search page and append
&search_engine=shoplyto the URL to preview AI Search
For example: https://demo.shoplyai.ai/search?q=beginner+skis&search_engine=shoply
You can also compare the results with the default search by setting &search_engine=compare instead.
Or change it back to &search_engine=default to see the original search results.
For example: https://demo.shoplyai.ai/search?q=beginner+skis&search_engine=compare
Once you’re satisfied with the results, go back to Settings and set it to Enabled to make AI Search the default for all customers.
Step 3: Customize AI Search Appearance
In the Shoply AI admin panel, navigate to the “Customize AI Search” section to configure how AI Search looks and feels on your store:
- AI Summary: Choose whether to show an AI-generated summary of search results at the top of the page
- Action Button: Choose what the product action button does — “Add to Cart,” “View Product,” or “No Button”
- Colors: Match the search interface to your store’s brand colors — adjust the button colors, and rating star colors
- CSS Styles: For advanced users, add custom CSS to further customize the look of search results
- Product Display: Control how many products to show per row and per page in search results
All changes are reflected in real-time on your store.
Step 4: Hide Certain Products from AI Search (Optional)
Shoply will only index ACTIVE products, not ARCHIVED or DRAFT products. However, if you want to exclude certain ACTIVE products from being indexed and recommended in search and chat, you can do it in two ways:
-
Use metafield
shoply.no_index: Add a metafield with namespaceshoply, keyno_index, value1. This will not have any effect on SEO, so you can use this safely. -
Use metafield
seo.hidden: Add a metafield with namespaceseo, keyhidden, value1. Note that this will also cause the product to not be eligible for external search engines like Google, so use it carefully. See more details here: Shopify SEO documentation .
After making changes, you need to manually trigger a “Recrawl” in the Shoply AI app, or wait until the index is automatically updated.
For more ways to exclude products — including bulk exclusion by tag, filtering out free products — see Which Products Does Shoply AI Index, and How to Exclude Certain Products .
Step 5: Control Product Data Visibility (Advanced)
For more granular control over what appears in search results and filters, go to “Settings” > “Advanced Settings” in the admin panel. Here you can:
- Hide specific product fields from search results (e.g., hide compare-at prices, discount percentages, or specific metafields)
- Control which metafields are used for smart filters
This is useful if you want to prevent certain product information — like wholesale pricing, internal SKUs, or discount amounts — from being visible to customers in search results.
For a detailed guide, see How to Manage Product Fields for AI Search .
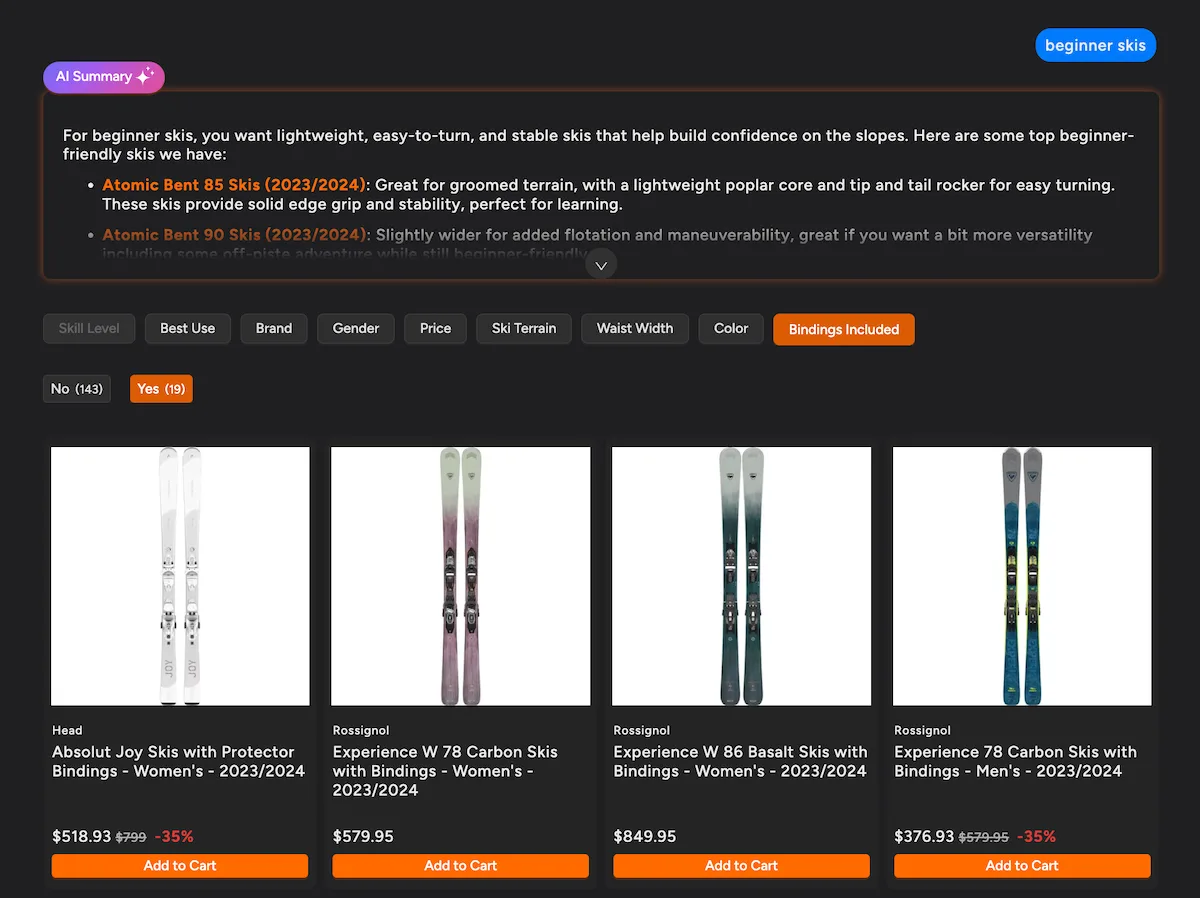
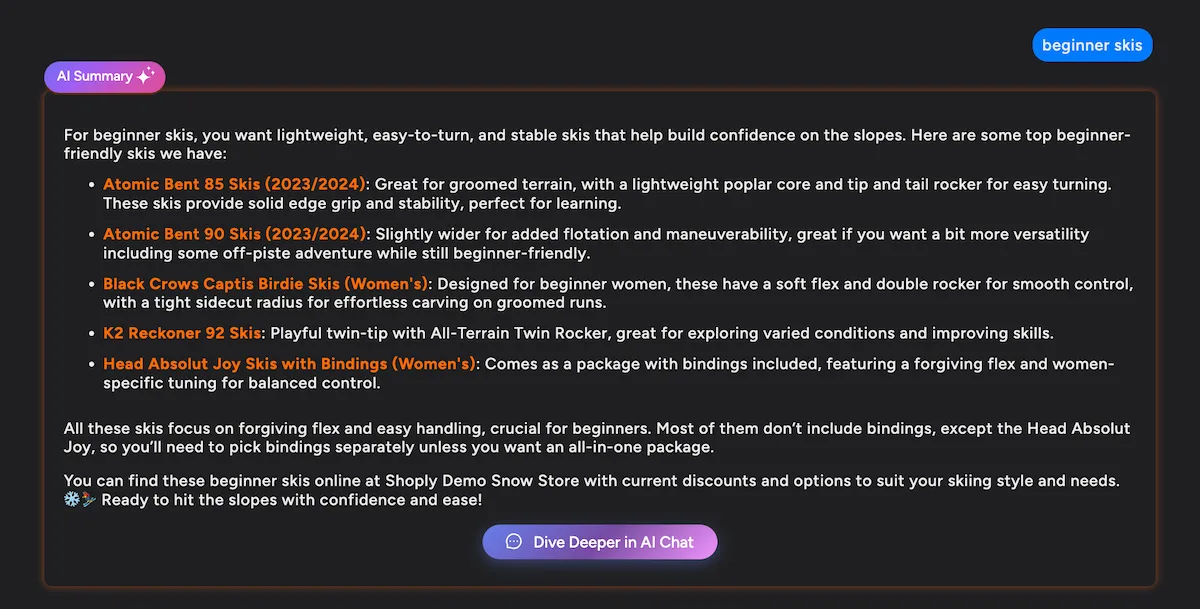
See It in Action
Here’s what your customers will experience with Shoply AI Search:
When a customer searches, they get three powerful sections in one view: an AI Summary that provides product selection recommendations, automatically generated filters based on the search context, and relevant product results ranked by AI understanding — not just keyword matching.
Customers can also click “Dive Deeper in AI Chat” to continue the conversation with the AI assistant for more personalized product recommendations and follow-up questions.
Troubleshooting
AI Search is not activated after typing a query
Shoply AI Search works by intercepting search requests on the standard Shopify search URL: /search?q=<query>.
If you have another search app installed that redirects queries to a different URL (e.g., /pages/search?query=... or a custom route),
Shoply AI Search will not activate.
To fix this, you can either:
- Uninstall the other search app so that search queries go to the default
/search?q=<query>URL - Reconfigure search redirect to use the standard
/search?q=<query>format
You can verify this by typing a query in your store’s search bar and checking the browser URL.
If it shows /search?q=your+query, Shoply AI Search should work correctly.
Get Started
Setting up AI Search on your Shopify store takes just a few minutes. Install the app, enable it in your theme, and your customers will immediately benefit from smarter, faster product discovery. If your catalog is heading past six figures of SKUs, it is worth knowing what changes about retrieval at scale so quality holds as you grow.
Need help? Book a meeting with us and we’ll walk you through the setup.
Happy selling!